If you want to keep your code from this year, you should “fork” your class
repo into your personal GitHub account. It is incredibly easy to do so I'd
recommend you do it just in case. If you don't make a fork now, you may lose
your code at some point after the school year when I'll probably delete the
original repos in the bhs-intro-to-programming organization.
(Normally a fork is a mechanism collaborating on open source projects: you fork the main repository of a project into your personal account and then make changes in your repository. Then you create pull requests, much like we've done this year, but they are sent to the owner of the original repository who can then incorporate your changes into their project if they want.)
You should be able to run Codespaces on your fork as you do now—all GitHub
accounts now come with some free Codespace usage. Note, however, that you
should continue to do any remaining work for this class in your
bhs-intro-to-programming repo and the Codespaces attached to that
repo.
The steps
Go to your GitHub repo page
On any assignment or assessment page, click on your GitHub user name at the top right of the screen.

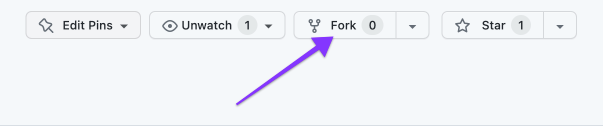
Click fork
This will take you to your GitHub repository. Click the fork button near the top right of the page.
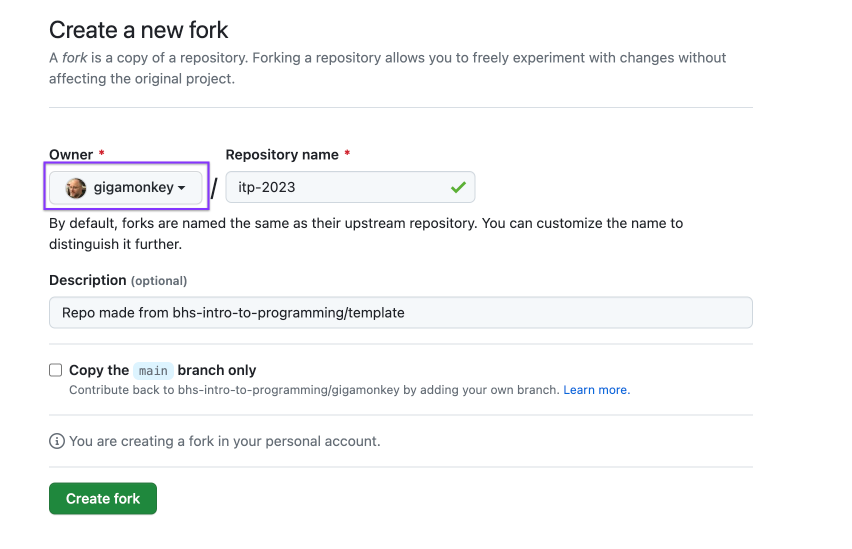
Set the owner
That will take you to the page shown below.. The first thing you need to do is to make sure the Owner drop-down (highlighted below) is showing your GitHub username so the fork will be created in your personal account.
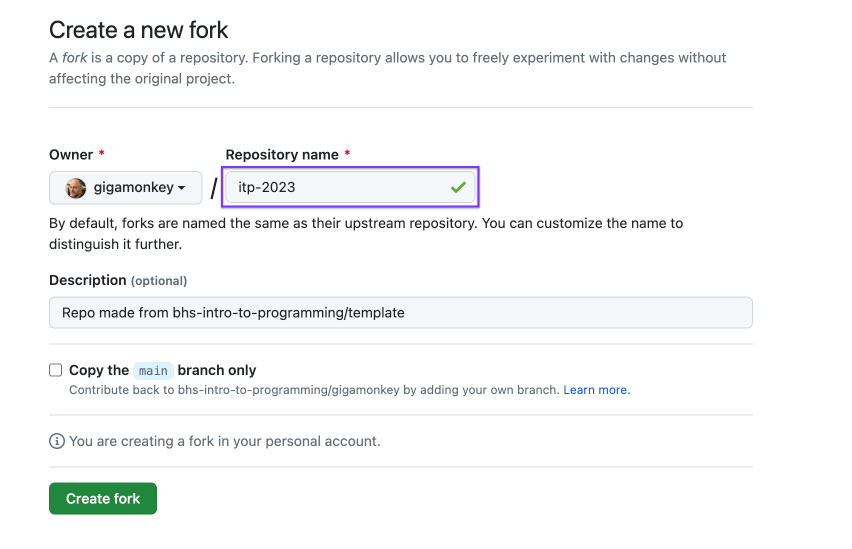
Name your fork
Then, pick a name for you fork. Since the repo in
the bhs-intro-to-programming organization is your GitHub user
name you'll probably want to change this to something else,
e.g. itp-2023 or intro-to-programming. It just has
to to be unique within your personal account.
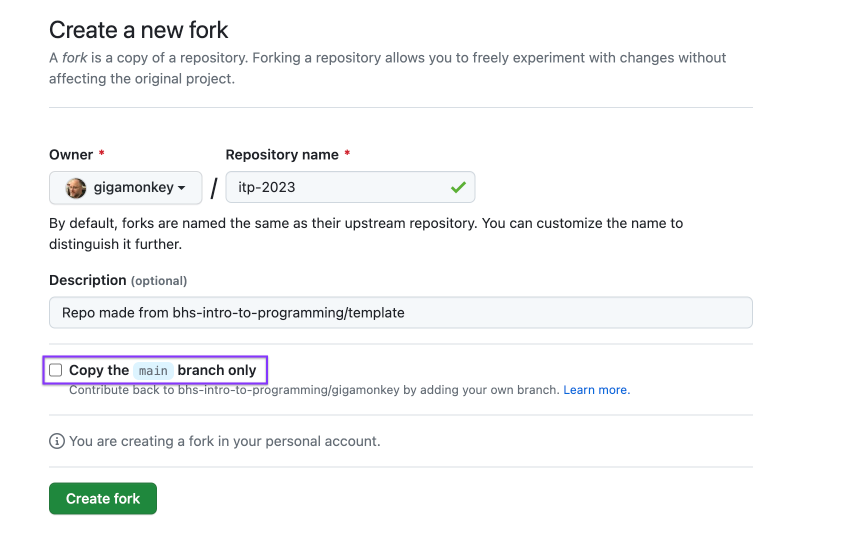
Copy everything
Be sure to uncheck the box next to “Copy the main branch only” so that all your branches in your repo will be copied to your new fork.
Make the fork
Finally click the green “Create fork” button. This will create a new repository in your personal account named whatever you selected in step 4 containing all the branches from your current repo (assuming you followed the instructions in step 5).
If you create the fork now you'll still be able to sync changes you make between now and the end of the year by selecting the branch you've changed and clicking “Sync Fork” on the page of the new repository.